
Getting to the Galápagos Islands is not a single-flight situation - it takes some planning, a couple of connections, a ferry ride, and a bus or two. But once you understand how the pieces fit together, it's actually pretty manageable. Here's the full breakdown of everything you need to know to get there and get around once you arrive.
Jump to:
Getting to Ecuador
You simply can't fly directly to the Galápagos from outside Ecuador. All flights to the islands originate on Ecuador's mainland, which means your first stop is an Ecuadorian city - either Guayaquil or Quito - before you hop on a domestic flight out to the islands. Plan to arrive on the mainland at least the night before your Galápagos departure, since nearly all flights to the islands leave in the morning.
Guayaquil
Guayaquil is Ecuador's largest city and its main commercial hub, located on the Pacific coast. The José Joaquín de Olmedo International Airport (GYE) is modern and well-connected, with direct flights from many US cities. If your priority is simply getting to the Galápagos with the fewest connections and the least complexity, Guayaquil is generally the simpler gateway - flights from here head directly to the islands with no additional stops.
However, if you plan to spend a night or two on the mainland before heading over to the islands, you might want to opt for Quito instead. Guayaquil has experienced some periods of unrest in recent years, and many areas are currently just not suitable for tourists.
Quito
Quito is Ecuador's capital and sits at high altitude in the Andes - which is a detail worth noting if you're arriving from sea level, as some people feel the altitude briefly. Mariscal Sucre International Airport (UIO) is about 45 minutes from the city center. Quito is genuinely beautiful, with a well-preserved colonial old town that's a UNESCO World Heritage Site. If you have the time to tack on a day or two, it's worth it.
We spent three nights in Quito before traveling on to the Galapagos Islands, and enjoyed seeing the city sights as well as hiking a part of Cotopaxi!
Flying to the Galápagos
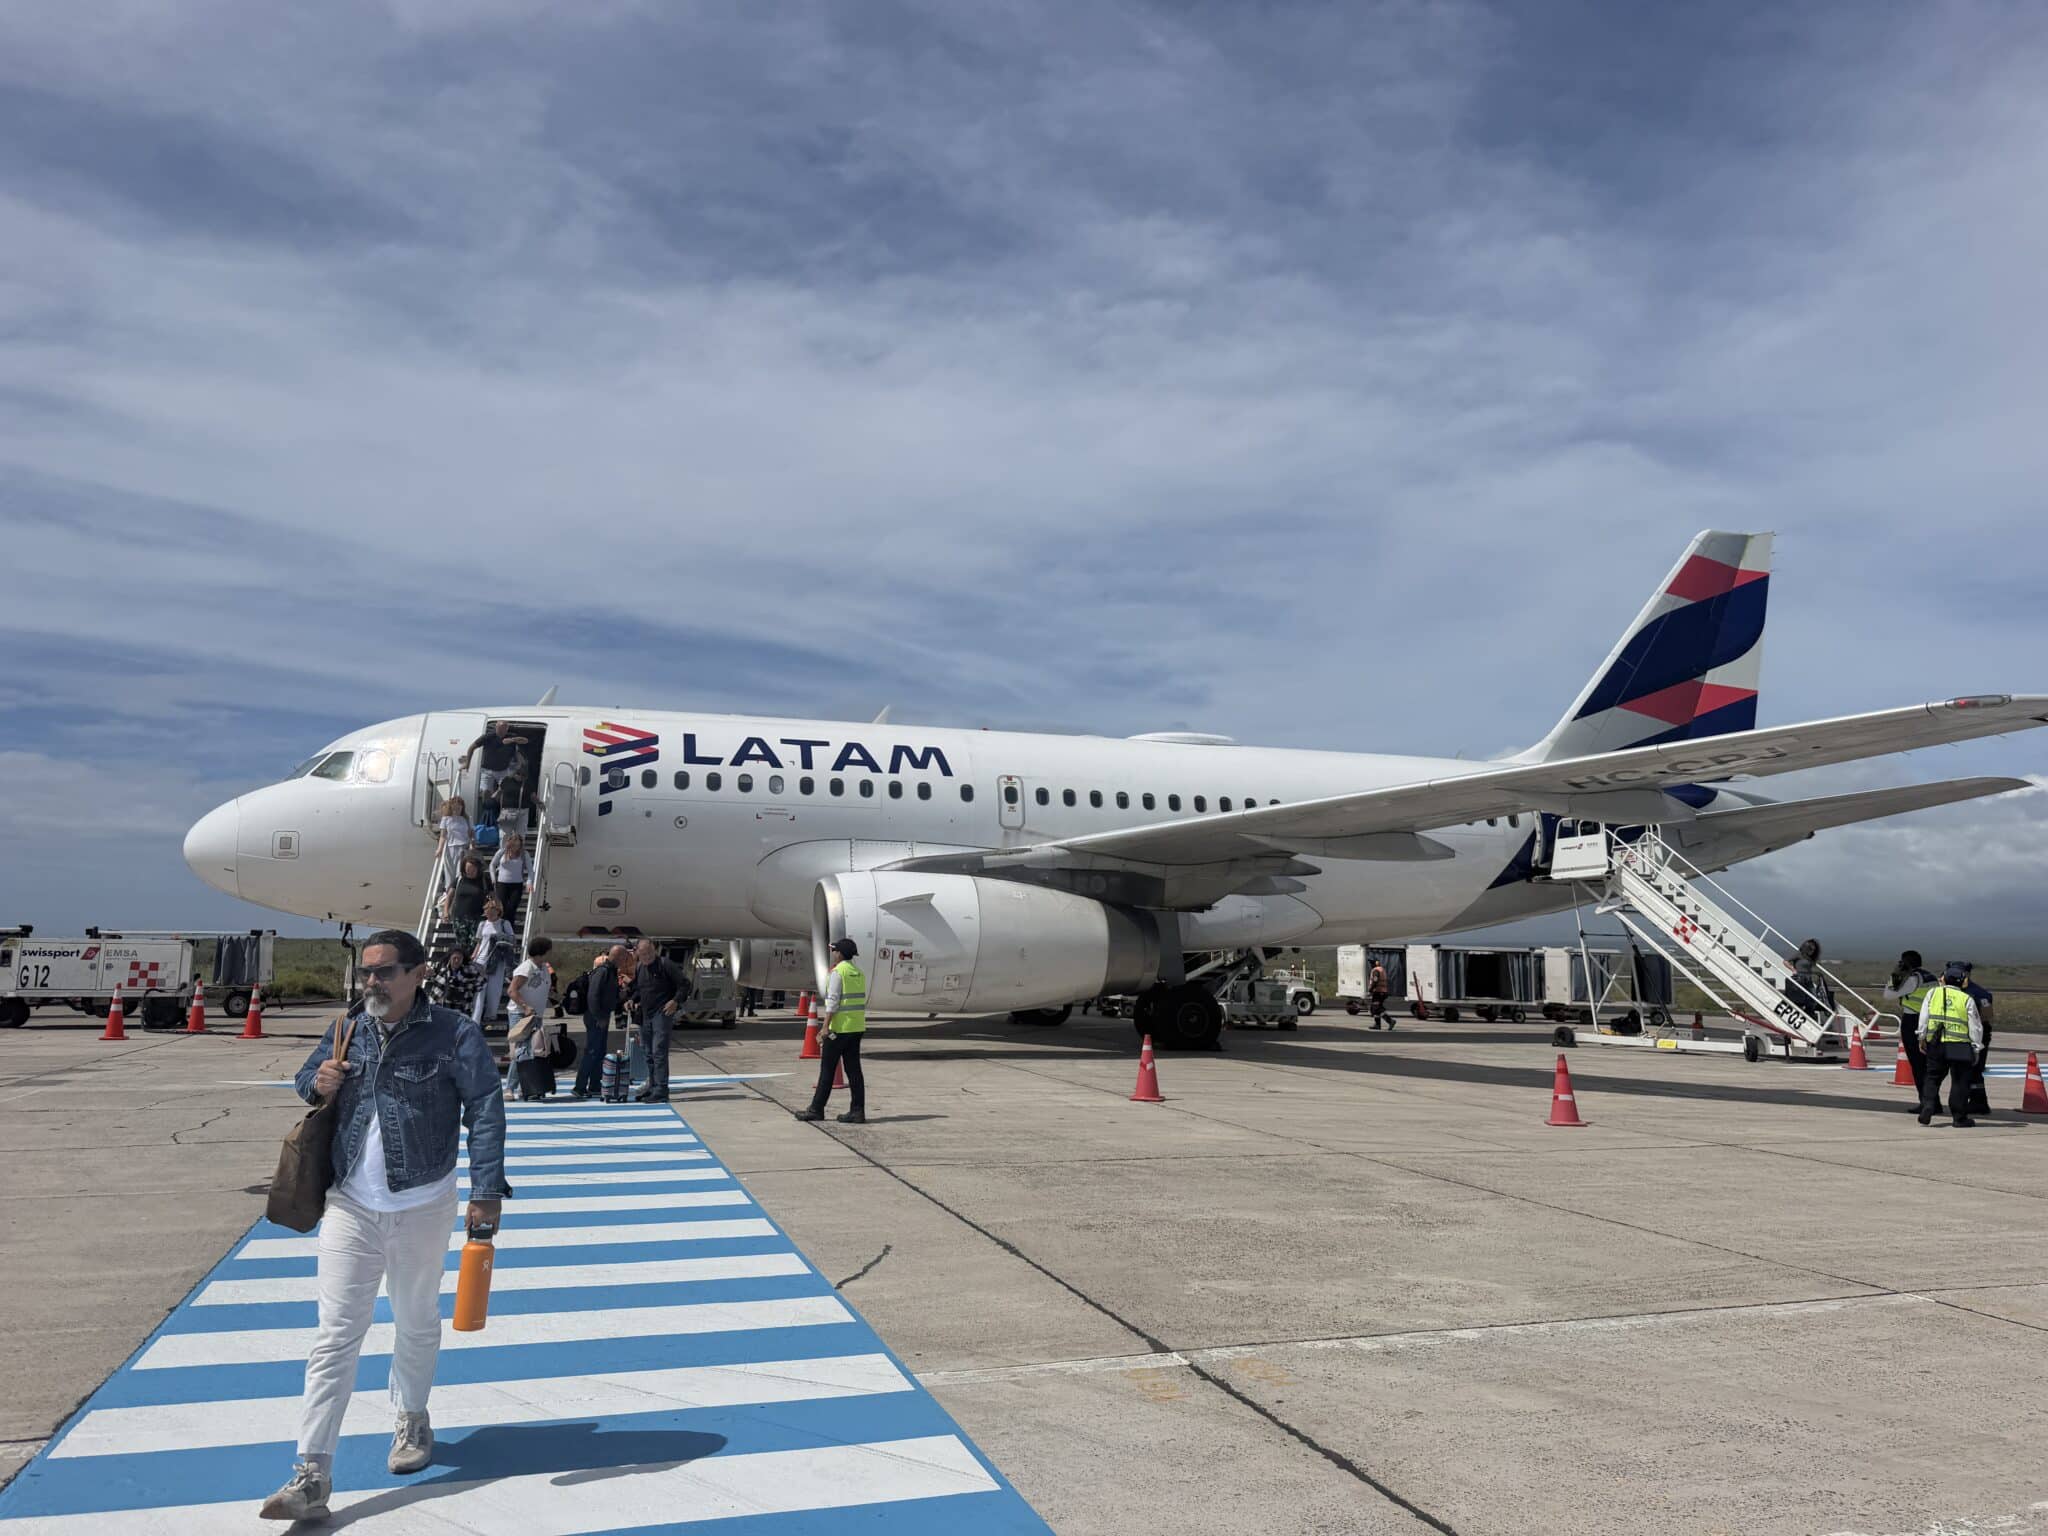
Regardless of which city you've arrived in, you'll need to catch another flight out to the Galápagos Islands. Nearly all flights depart in the morning hours, which is why it's so important to be in your departure city by the night before - rushing to make a morning Galápagos flight after an overnight international connection is not a position you want to be in.
The two main domestic carriers operating these routes are LATAM and Avianca, and both fly to the Galápagos daily. Flights from Guayaquil to the islands take about an hour. If you're flying from Quito, you may have a direct flight or a brief stop in Guayaquil - but if there's a stopover, it's typically a short refueling pause where you stay in your seat while the plane takes on fuel and additional passengers before continuing on. It's not like a connecting flight where you need to deplane and re-board.
There are two airports in the Galápagos that accept flights from the mainland: Baltra (GPS) on Santa Cruz Island, and San Cristóbal (SCY). Which one you fly into will depend on your itinerary and where you're starting your trip.
Before You Fly: TCT Card, Declaration & Agricultural Inspection
This is the part that trips people up if they haven't done their homework. Before you board your flight to the Galápagos, there are a few requirements you need to handle - and most of it is now done online.
TCT Card & Biosafety Declaration
The TCT (Transit Control Card) is required of every visitor to the Galápagos. It's how the government tracks who is on the islands and for how long - and it's also tied to your park entry fee process. The TCT now costs $20 per person and must be completed online within 48 hours before your flight at the official government registration portal.
In addition to the TCT, you'll need to complete a Biosafety Sworn Declaration through the Galápagos Biosafety and Quarantine Agency (ABG) - also free, also online, also within 48 hours of your flight. As of early 2026, the paper version no longer exists; everything is digital. Keep your confirmation handy on your phone.
When you arrive at your departure airport in Quito or Guayaquil on the day of your Galápagos flight, you'll go to the CGREG counter to have your passport and TCT validated before you can board. Build time for this into your airport arrival - give yourself at least 2.5 to 3 hours before your flight.
Agricultural Inspection (ABG)
After your TCT validation, your bags will go through a biosecurity inspection run by the ABG. This is a program designed to protect the islands' unique ecosystem from invasive species, and they do take it seriously. All luggage goes through X-ray, and trained sniffer dogs patrol the inspection area looking for anything that shouldn't be heading to the islands.
That means no fresh fruits, vegetables, seeds, or meats in your luggage. Even a forgotten apple or some nuts at the bottom of your day bag can cause a delay. Do a sweep of your bags before you head to the airport and pull out any food items you're not sure about. It's not worth the hassle.
Luggage Allowances
For your mainland-to-Galápagos flight, the standard allowance is 1 checked bag up to 23 kg (50 lbs) and a carry-on up to 8 kg (17 lbs). This is pretty standard and shouldn't cause issues for most travelers. Although, there are some budget fares offered that include less luggage, so be sure to know what you have purchased.
If you're planning to take interisland flights within the Galápagos (more on that below), note that the weight limits are dramatically more restrictive - we're talking 25 lbs / 11.5 kg total across all bags combined. If that's part of your itinerary, pack accordingly from the start, or plan to store heavier bags as you travel around.
Arriving in Baltra
Baltra is the main gateway for visitors staying in Puerto Ayora on Santa Cruz Island - the most popular base for exploring the Galápagos. In fact, nearly 70% of the Galapagos bound flights arrive at Baltra. Getting from the airport to town is a multi-step process, but it moves quickly and is easy to navigate.
Park Entry Fees
The very first thing you'll deal with when you land in Baltra - even before you collect your bags - is paying the Galápagos National Park entrance fee. Here's what you'll currently pay:
- Adults (12 and over): $200 USD
- Children under 12: $100 USD
- Children under 2: Free
Cash only, US dollars. This is not a place to show up with only a credit card. Come prepared with the right amount in cash, as making change is not always easy. This fee doubled in 2024 (it was previously $100 per adult), so if you're looking at older trip reports, don't be surprised by the jump.
Baggage Inspection & Pickup
After paying your entrance fee, you'll collect your luggage from the baggage claim area. But before your retrieve your bags, they will go through one more round of biosecurity inspection - including a check by sniffer dogs, looking for any disallowed agricultural products. Just be patient - it moves quickly enough.
Bus to the Ferry Terminal
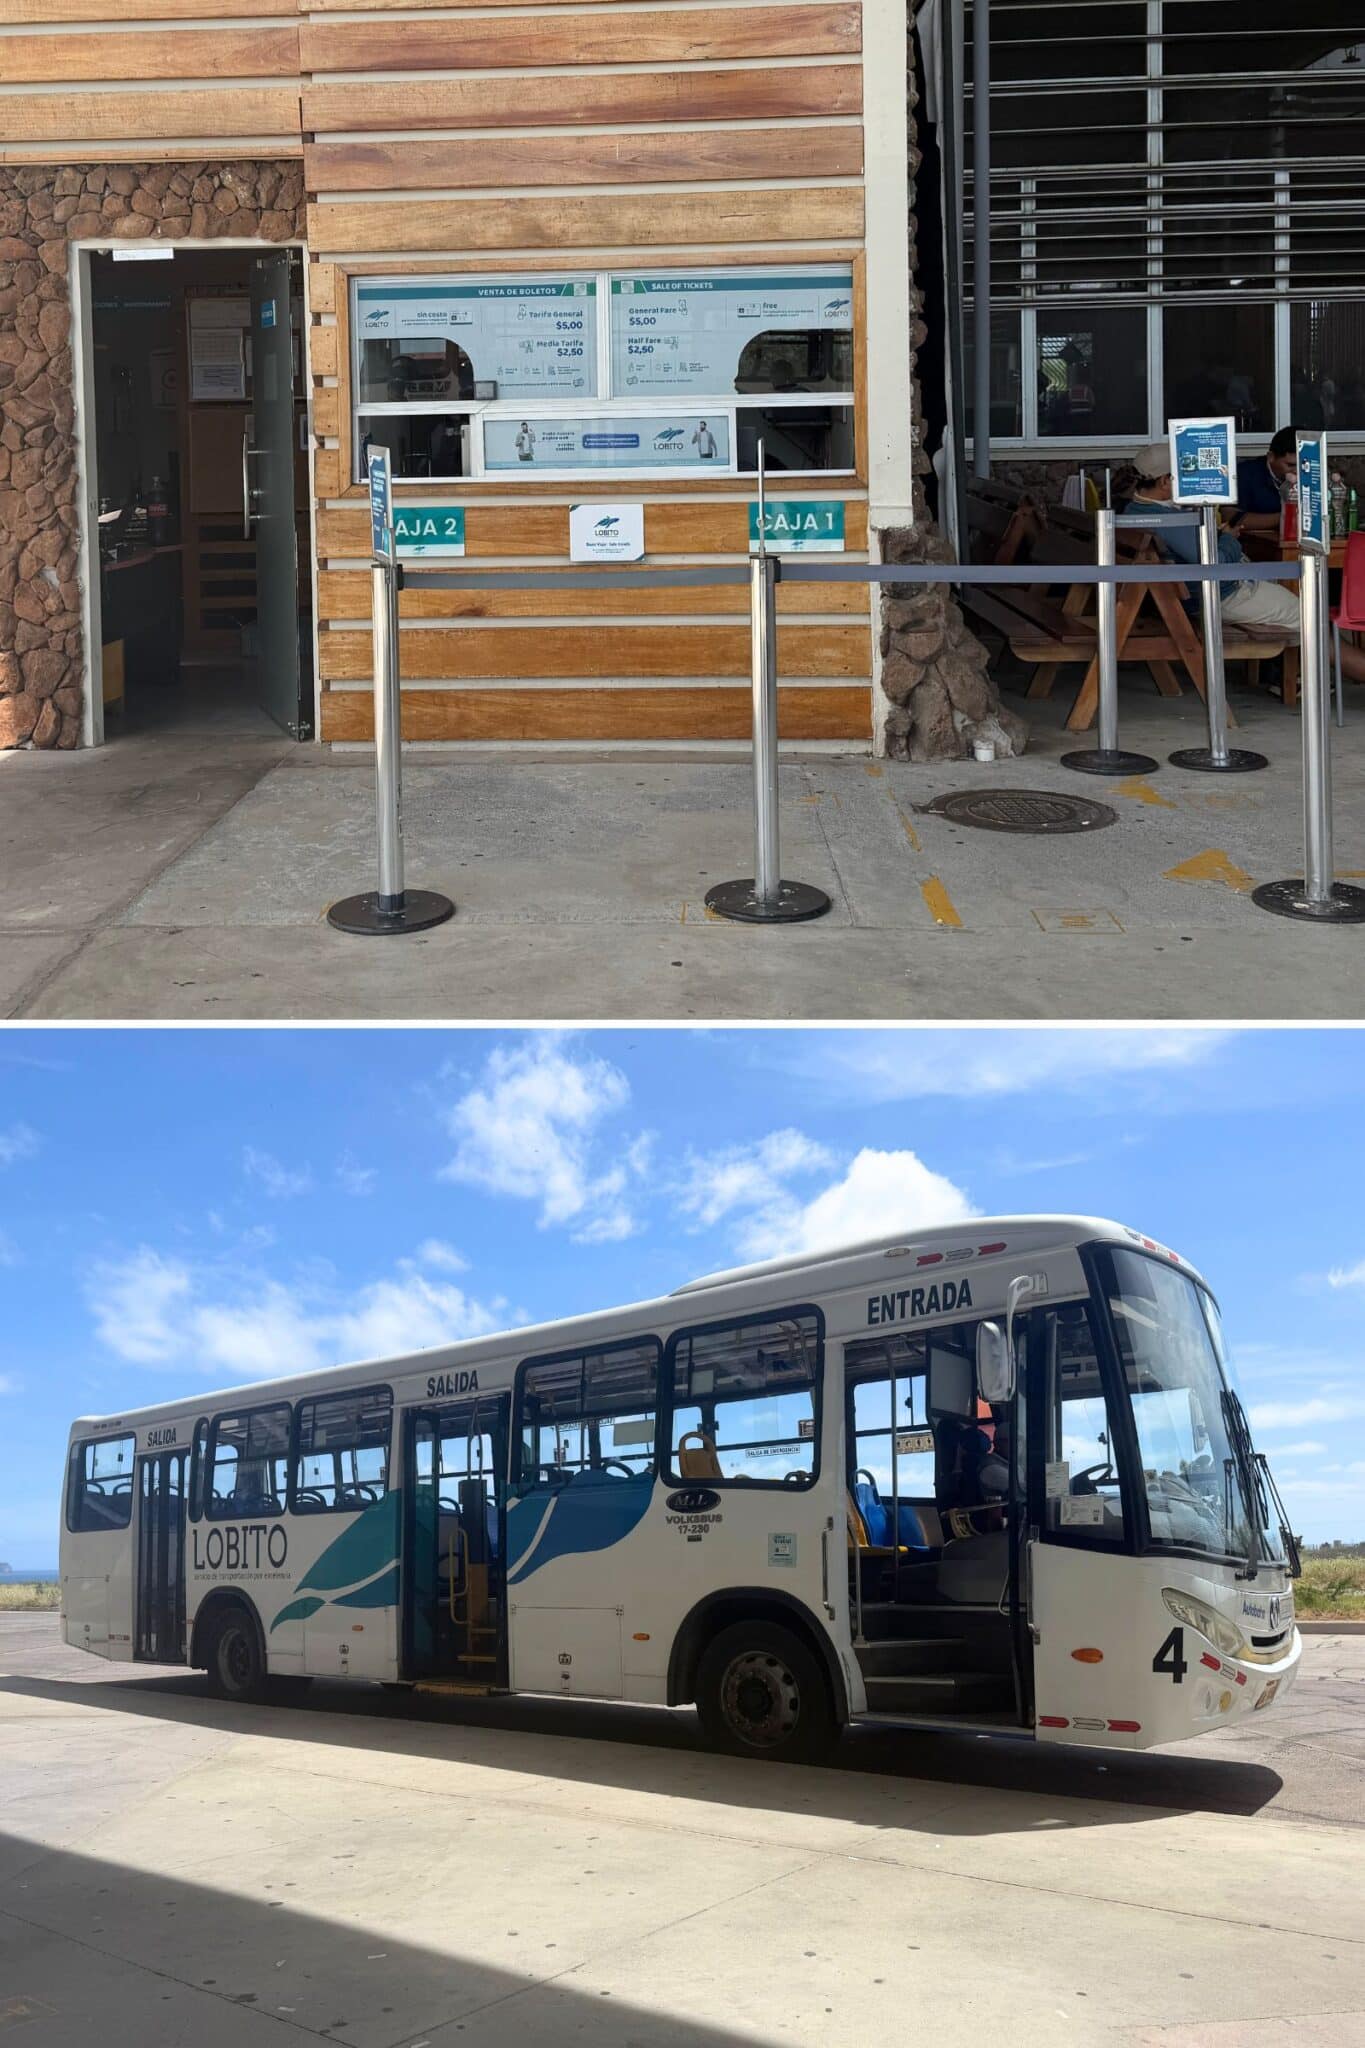
Once you're through inspection and out of the terminal, look for the Lobito Bus. It runs directly from the airport to the Itabaca Channel Ferry Terminal. Purchase your ticket at the counter right outside the terminal, stow your luggage underneath, and hop on.
Ticket prices are currently $5 per person, or $2.50 for children (up to 12 years old). The ride is only about 5-10 minutes, and the staff will help move your bags from the bus to the ferry. Easy.
Ferry Across the Itabaca Channel
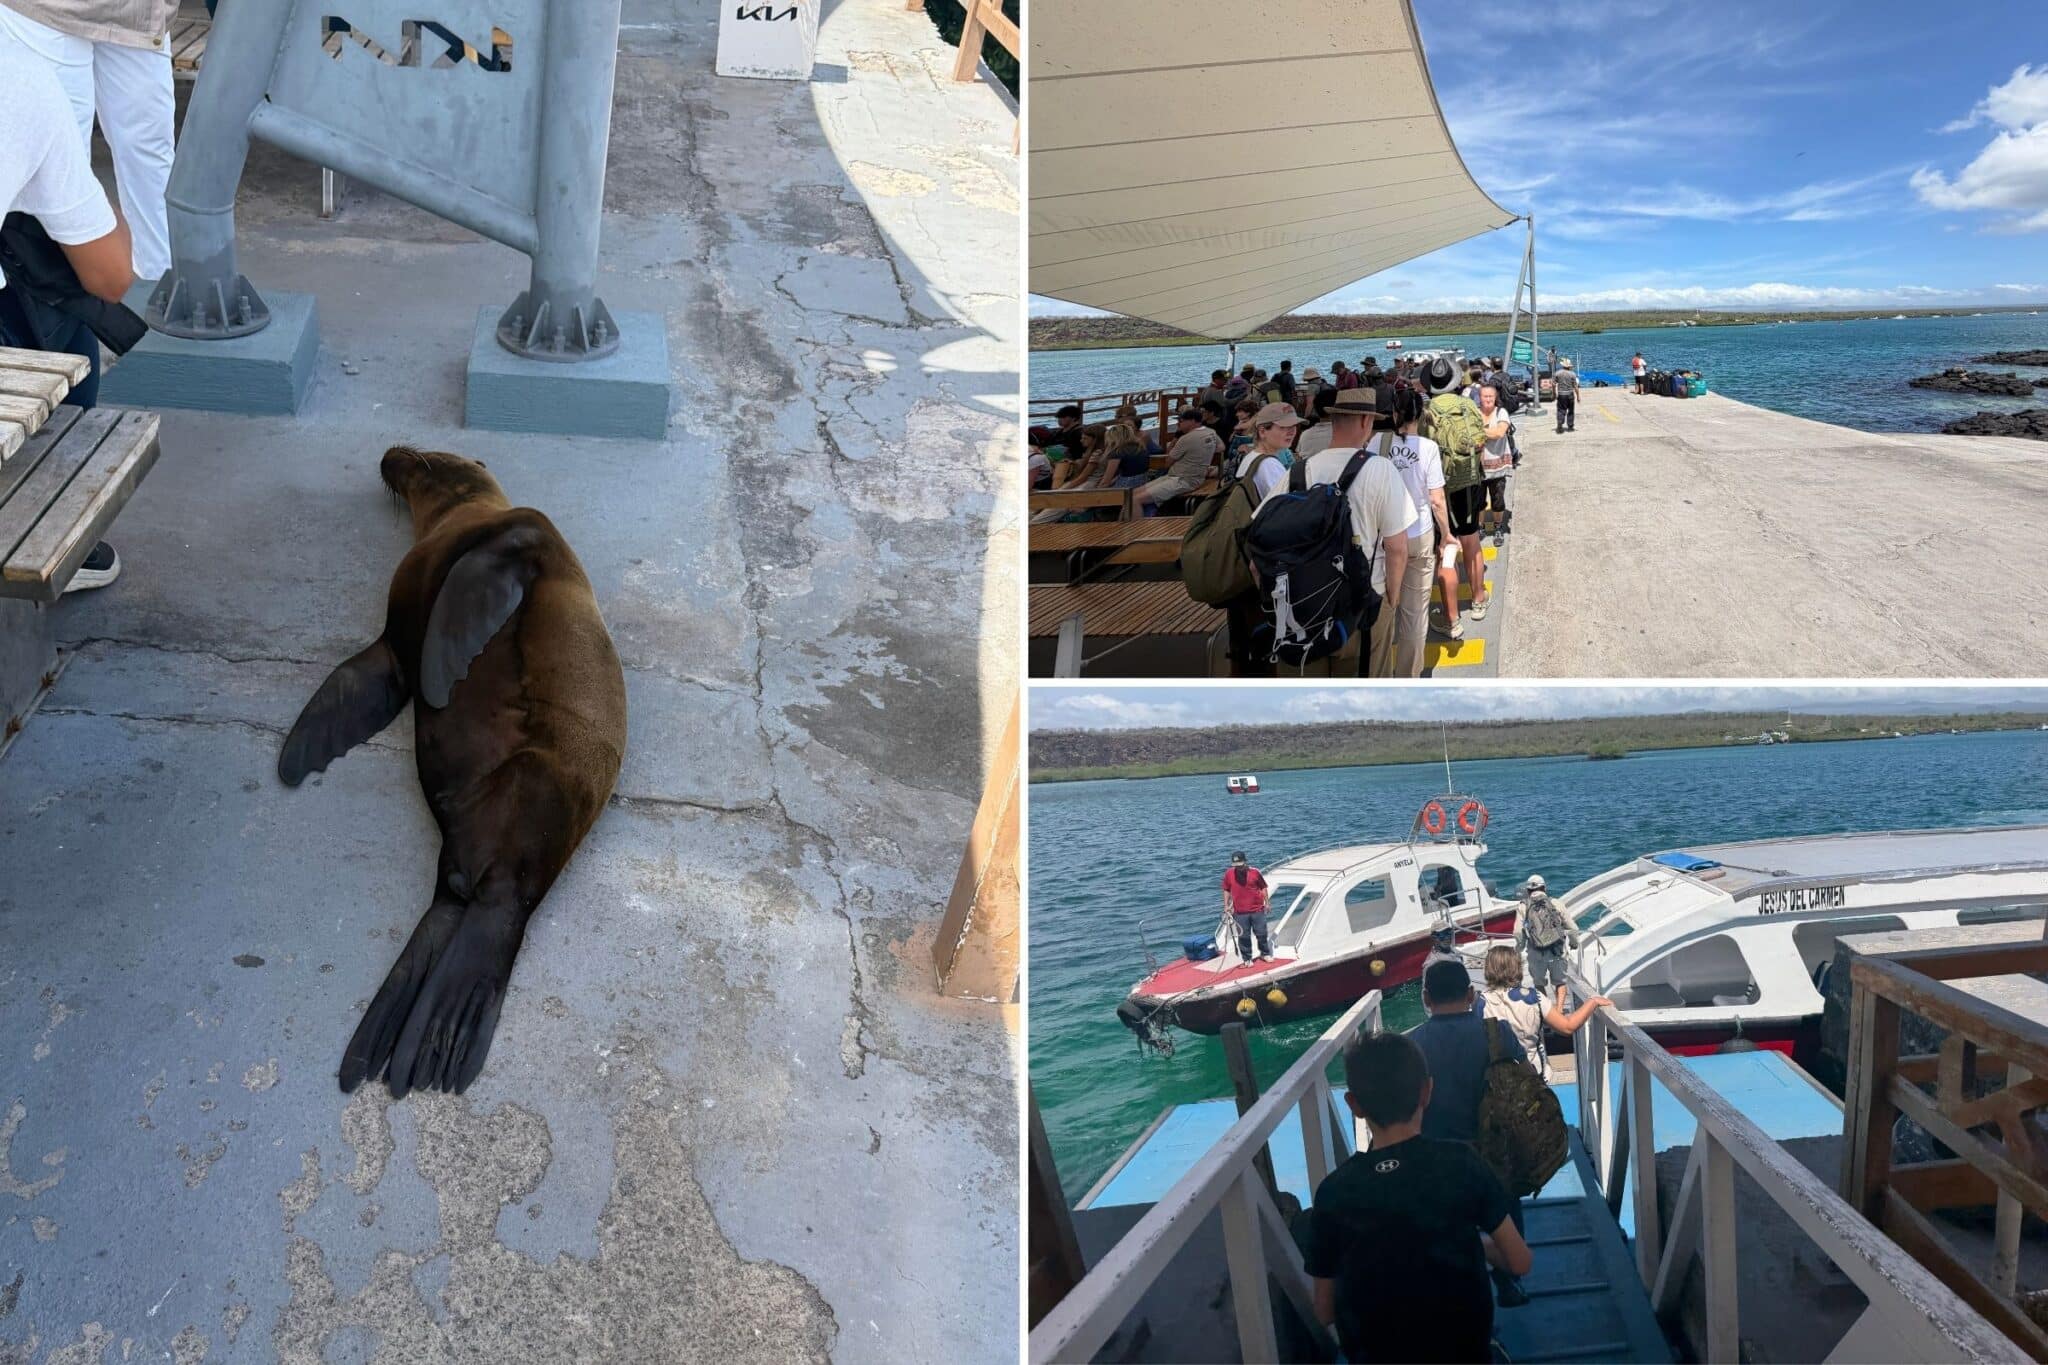
The Itabaca Channel separates Baltra Island from Santa Cruz Island, and you cross it on a small government-operated ferry. It takes just 5-10 minutes to cross. There will likely be a line of people waiting for the ferry, but they run continuously and hold a lot of people, so it does move very quickly.
A note on your luggage! The staff will unload the luggage from the buses and get it onto the ferries. But your luggage may not end up on the same ferry as you. Don't worry about it. All the luggage will end up on the other side, one way or another. Our bag was whisked away, but was waiting on the ferry dock across the channel when we got there. Along with a napping sea lion, who seemed oblivious to all of the arriving tourists.
The ferry is supposed to cost $1 per person, but they weren't collecting that fee when we passed through last. So your mileage may vary on that one. It's a good idea to have some small bills in case you need them.
Bus or Taxi to Puerto Ayora
Once you step off the ferry on the Santa Cruz side, you have two options for the final leg into Puerto Ayora, which is about 45 minutes away:
Public bus ($5/person) - The budget option. Departs from just outside the ferry landing and drops you in the town of Puerto Ayora.
Taxi ($35 flat rate for up to 4 people) - Faster and much more comfortable, especially if you're hauling luggage or kids. The "taxis" are mostly white pickup trucks, and your luggage will go in the truck bed. And of course, the taxi will drop you directly at your accommodation, rather than the bus stop.
Arriving in San Cristóbal
If your itinerary starts on San Cristóbal, the arrival experience is significantly simpler than Baltra. The San Cristóbal airport is located right on the edge of Puerto Baquerizo Moreno, the island's main town - and I mean right on the edge. The town center is about a 15-minute walk from the terminal, or a $2-4 taxi ride.
There's no ferry, no bus connection, no channel crossing. You land, collect your bags (and go through the same park fee and biosecurity process as Baltra), and you're basically in town. It's refreshingly straightforward.
Getting Between Islands
There are three main inhabited islands that most visitors move between: Santa Cruz, San Cristóbal, and Isabela. You have two options for island hopping: ferries or small charter flights.
Interisland Ferries
Ferries are the most common and budget-friendly option. They depart twice daily - at 7:00 AM and 3:00 PM - from each island. The journey takes approximately:
- Santa Cruz to/from San Cristóbal: ~2 hours
- Santa Cruz to/from Isabela: ~2.5 hours
Current fares are approximately $30-$38 per person, one way. Note that there is no direct ferry between Isabela and San Cristóbal - you have to route through Santa Cruz.
A couple of additional costs to know about: there's a water taxi you'll need to take from the dock out to the ferry (about $1 per person each way), plus a small dock fee. If you're heading to Isabela, there's also a $10 per person arrival fee collected at the dock.
You should note that the inter-island ferries cross open ocean and can be rough, especially in the afternoon. If you're prone to seasickness, the 7 AM departure is generally calmer than the 3 PM. They can also be very hot and very crowded. It's really not a particularly fun experience. Pack motion sickness medication just in case, and maybe skip a big breakfast before an afternoon crossing.
Interisland Flights - Emetebe
If you can afford the upgrade and the flight schedules work for you, Emetebe Airlines offers small-plane inter-island flights that are significantly more comfortable than the ferry. The planes are small - 9-passenger Cessnas - and flights between islands take about 40-45 minutes compared to 2+ hours on the ferry.
Current fares are approximately $150-$200 per person, one way. Flights operate daily, though scheduling can be limited and seats fill up, so book well in advance.
One critical detail if you're flying Emetebe: the luggage allowance is extremely strict. You may only bring just 25 lbs / 11.5 kg total per person covering both your checked bag and carry-on combined. This is a big constraint if you're not packing light, so keep it in mind when planning.
It may be possible to bring extra luggage along for an additional charge, but it won't necessarily be on the same flight as you in that case, so be prepared for some logistical challenges.
Getting Around on the Islands
Taxis
Taxis are the main way to get around on all three islands. A few things to know: taxis in the Galápagos don't have meters, so always agree on a fare before you get in. Rates are generally low for short local trips - you're often talking $2-5 to get around Puerto Ayora - and drivers are used to tourists, so most negotiations are quick and painless.
For longer trips, like getting from Puerto Ayora to the highlands or out to a trailhead, expect to pay more (around $25-35 and often the driver will wait for you and bring you back, which is worth asking about). Your hotel can also arrange this for you.
Bicycles & Walking
In Puerto Ayora on Santa Cruz, the town center is very walkable. The Charles Darwin Research Station is about a 15-minute walk from the main waterfront, for example. Bike rentals are available and are a reasonable option for getting around on flatter ground, and there are bike lanes throughout the downtown area.
Puerto Baquerizo Moreno on San Cristóbal is quite compact and flat, making it one of the most walkable towns in the islands. You can cover a lot of ground on foot here.
Isabela is arguably the best island of the three for getting around by bike. Puerto Villamil has very few cars, minimal traffic, and a laid-back pace. Bike rentals are widely available throughout town - expect to pay around $15/day or $2-5/hour. One of the most popular routes is pedaling out to the Wall of Tears, a sobering historical site about 3-4 miles from town (depending on where you start). It makes for a nice half-day trip by bike. For longer excursions into the highlands or out to more remote sites, you'll want a taxi or a guided tour.
Where a Tour is (and Isn't) Required
This is something worth understanding before you go. The Galápagos National Park covers about 97% of the land area of the islands, and most visitor sites within the park require you to be accompanied by a licensed naturalist guide. You simply cannot walk or drive into most national park sites independently. So it's important to understand that even if you plan a land-based trip, you will also need to schedule guided day tours to see many of the famous visitor sites.
That said, there are places you can explore without a guide - the town areas, certain beaches, the Charles Darwin Research Station, and some other accessible spots. Independent exploration is possible, but it's more limited than many visitors expect. If your goal is to see wildlife up close in the more remote and protected areas, you'll be booking day tours or a cruise.
For more details, you can check out my Galapagos: Island by Island guide, which lists out all of the accessible islands and the popular visitor sites on each one.
Money Basics
Good news on one front: Ecuador uses the US Dollar as its official currency, so if you're American, there's no currency exchange to deal with at all. Everyone else should still plan to arrive with dollars in hand, since exchanging money on the islands is not convenient.
And that's important, because cash is still king in the Galápagos. Many smaller businesses - small restaurants, souvenir shops, taxis - don't accept credit cards, or will tack on a surcharge if they do. Between your park entry fee, TCT card, taxis, ferries, and incidentals, you'll want to arrive with more cash than you think you need.
ATMs exist, but don't rely on them. Puerto Ayora on Santa Cruz has the most reliable options, with a couple of bank ATMs in town plus one inside the Proinsular supermarket. San Cristóbal has at least one, though it's known to run out of cash or limit you to around $300 per day. Isabela has no reliable ATM at all - bring whatever cash you'll need for your time there from the mainland or from Santa Cruz before you go. Expect withdrawal limits and a fee of around $5 per transaction wherever you do find a machine.
Bottom line: pick up cash in Quito or Guayaquil before you fly out, and budget generously - for your park fee and TCT card, plus taxis, incidentals, tips, and a cash cushion for Isabela specifically.
Connectivity
WiFi is more available than you might expect. Hotels in Puerto Ayora, Puerto Baquerizo Moreno, and Puerto Villamil offer guest WiFi, and even the airports have free WiFi. It can still be slow and inconsistent, especially outside the main towns, but it's there. If you're on a cruise, the situation has improved a lot in the last couple of years - Starlink coverage has made onboard WiFi common now, though you won't be connected while you're out on excursions.
Cell service works reasonably well in the main port towns, but drops off fast once you're away from them - and there's essentially no signal once you're out on the water, whether that's an interisland ferry or a cruise between sites.
Before you assume you need a local SIM, check what your existing plan already covers. Many US carriers have roaming coverage in Ecuador, either as part of an international plan or via a day-pass. Verizon and AT&T both offer day-pass options if your base plan doesn't include international coverage.
We have international coverage built into our own plans and paid nothing extra for it in Ecuador. For my son's less expensive plan, Verizon's day-pass ran us $12/day, which covered him for the whole trip. Once we boarded our Galapagos cruise, we just used their Starlink connection.
But if you do need a local SIM, Claro and Movistar are Ecuador's two major carriers. You can pick one up at a shop in Quito or Guayaquil before you fly out - it's not something you'll easily sort out once you're on the islands.
If you'd rather skip the SIM shop altogether, an eSIM from a provider like Airalo or Holafly is the easiest option - you can set it up before you even leave home. Just don't expect much beyond 4G, and there will not be coverage at remote sites or on open water.
More Galapagos Planning Resources
It sounds like a lot of moving pieces - and it is - but in practice, it all flows pretty smoothly once you know what's coming. Get your TCT and biosafety declaration done in advance, arrive at your departure airport with time to spare, and the rest mostly takes care of itself.
If you're still deciding between a land-based trip and a cruise (or some mix of both), our guide on how to choose a Galapagos cruise can help you work through that. And once you've got your itinerary locked in, our what to pack and island by island guides will help you get the rest of the trip planned out.
Leave a Reply